
18
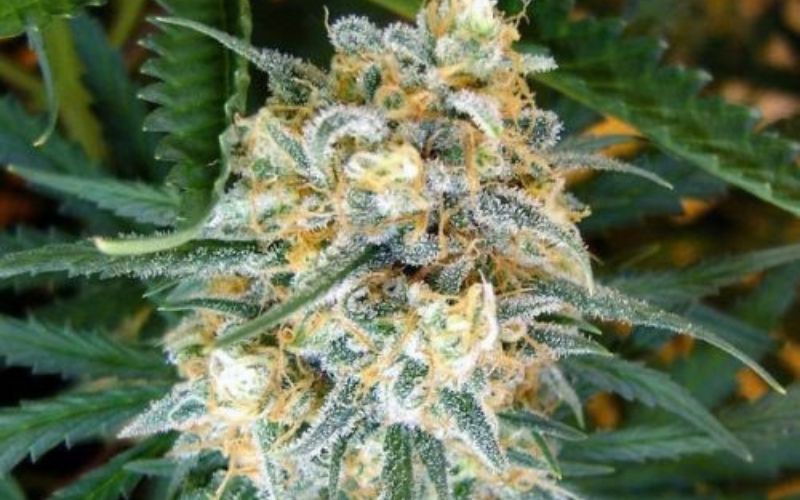
Ordering rooted cannabis clones is an exciting step, but what you do during the first few days after delivery can have a major impact on how quickly your plants settle into their new environment.
Live plants can experience stress during packaging, transportation, temperature changes, and handling. Even a healthy clone may look slightly different when you first open the package. The goal is not to make dozens of changes immediately. Instead, focus on inspection, gentle acclimation, stable environmental conditions, and careful watering.
If you have recently received cannabis clones from Healthy Cannabis Clones, this guide explains what to do from the moment you open the package through the first week of establishment.
Important: Cannabis cultivation is subject to federal, provincial, territorial, and municipal rules in Canada. Before growing, verify the regulations that apply where you live. Health Canada states that adults of legal age may grow up to four cannabis plants per household under federal law, subject to additional provincial, territorial, and municipal restrictions.
What Should You Do Immediately After Your Cannabis Clones Arrive?
The first mistake many growers make is rushing.
You open the package, see a plant that looks slightly tired after shipping, and immediately start watering, transplanting, feeding, or placing it under intense light.
That can create additional stress.
Instead, follow a simple sequence:
- Open the package carefully.
- Inspect each clone.
- Check the growing medium and roots.
- Look for signs of shipping stress.
- Place the clones in a stable environment.
- Provide gentle light.
- Avoid excessive watering.
- Allow the plants to acclimate.
- Transplant when appropriate.
- Monitor them closely during the first week.
The first few days are about stability rather than aggressive growth.
Step 1: Open the Package Carefully
When your clones arrive, handle the package gently.
Do not immediately pull the plants out by their stems or branches. Remove the packaging carefully and support the container or root area while taking the clone out.
During transportation, leaves may become slightly compressed or droop. This does not automatically mean the plant is unhealthy.
Look at the entire plant rather than judging it from one or two leaves.
Check for:
- Broken or severely bent stems
- Loose growing medium
- Excessive dryness
- Excessive moisture
- Damaged leaves
- Unusual discoloration
- Visible pests
- Mould or fungal growth
- Damaged roots, if the root area is visible
- General signs of severe stress
A little temporary drooping after transportation can happen. What matters is how the plant responds after it has been placed into a stable environment.
Step 2: Photograph the Clones Before Doing Anything
This is a simple step that is often overlooked.
Take clear photographs of each plant immediately after opening the package.
Photograph:
- The entire plant
- Leaves
- Stem
- Growing container
- Root area, if visible
- Any damage you notice
- Packaging, if there appears to be shipping damage
These photographs provide a useful record of the plant’s condition when it arrived.
They can also be helpful if you need to contact the supplier about a damaged or unhealthy shipment.
Healthy Cannabis Clones states that it offers an arrive-alive guarantee and asks customers to contact the company when clones arrive damaged or in poor condition.
Step 3: Give the Clone Time to Acclimate
Your clone has just moved from one environment to another.
The temperature, humidity, airflow, light intensity, and moisture conditions may all be different from what it experienced before shipping.
For this reason, the first few days should be focused on acclimation.
Healthy Cannabis Clones recommends keeping newly arrived clones in a warm environment with higher humidity and gentle light during the initial adjustment period. Its current grow guidance recommends approximately 65–75% humidity during the first few days and gradually increasing light intensity as the plant begins showing new growth.
A stable environment is generally more useful than trying to force rapid growth immediately.
During acclimation:
- Avoid sudden environmental changes.
- Use gentle lighting initially.
- Maintain appropriate humidity.
- Keep temperatures stable.
- Avoid excessive watering.
- Monitor the plant daily.
Think of the first few days as a recovery and transition period.
Step 4: Don’t Overwater the Clone
One of the most common mistakes after receiving a clone is assuming that a slightly droopy plant needs a lot of water.
That is not always the case.
Shipping stress can cause temporary drooping, while excessive water can reduce oxygen around the roots and create additional problems.
Healthy Cannabis Clones specifically recommends keeping the growing medium moist but not saturated and identifies overwatering as one of the most common early problems.
Before watering, check the condition of the growing medium.
If it is already adequately moist, give the plant time.
If it is genuinely dry, provide appropriate water rather than repeatedly adding small amounts simply because the leaves look tired.
Remember:
Drooping does not automatically mean the plant needs more water.
Check the growing medium and the overall condition of the plant before making a decision.
Step 5: Use Gentle Light at First
Newly delivered clones generally do not need the strongest possible light immediately.
A plant that has just experienced transportation stress may respond better to moderate lighting while it adjusts.
Healthy Cannabis Clones recommends starting with moderate light and increasing intensity as the plant demonstrates new growth.
The exact light distance and intensity depend on the type of grow light, its power, the growing environment, and the manufacturer’s recommendations.
Instead of following a single distance for every light, watch the plant.
Signs that the light may be too intense include:
- Leaves curling upward
- Bleaching
- Excessive leaf-edge stress
- Rapid wilting despite adequate moisture
- Heat building around the canopy
Give the plant time to adjust before increasing light intensity.
Step 6: Maintain a Stable Temperature
Temperature changes can add unnecessary stress during the acclimation period.
Healthy Cannabis Clones currently recommends approximately 22–26°C as a general temperature range for early root and shoot development.
Avoid placing newly arrived clones:
- Directly beside a heater
- Directly under a strong heat source
- In a cold draft
- Directly beside an air-conditioning outlet
- In an area with extreme temperature fluctuations
The objective is consistency.
A stable environment gives the plant a better opportunity to recover from transportation and begin producing new growth.
Step 7: Check the Roots Before Transplanting
If your clone is already rooted, the root system is one of the most important things to evaluate.
A healthy-looking canopy does not always tell you everything about what is happening below the growing medium.
Look for evidence of established roots when the growing setup allows you to inspect them without unnecessarily disturbing the plant.
Avoid repeatedly pulling the clone out of its container just to inspect the roots.
Healthy establishment generally involves:
- Firm plant structure
- Active root development
- New growth
- Consistent leaf condition
- Increasing stability after transplantation
If the roots are already established, the plant may be ready for its next container or growing medium once it has had an opportunity to settle.
Step 8: Prepare the Growing Medium Before Transplanting
Do not wait until the clone arrives to prepare everything.
Ideally, your growing container and medium should already be ready.
Depending on your chosen cultivation system, this could include:
- Soil
- Coco-based medium
- Hydroponic systems
- Another appropriate growing medium
The important point is that the medium should be prepared before the transplant.
You do not want a live clone sitting around for hours while you prepare its new environment.
Step 9: Transplant Carefully
Once the clone has acclimated and is ready for its new container, transplant it carefully.
Avoid unnecessary manipulation of the roots.
Handle the plant by the container or root area rather than squeezing the stem.
Place the clone at an appropriate depth for the root system and growing medium, then provide the amount of moisture appropriate for that medium.
Do not immediately compensate for transplant stress with excessive water or nutrients.
Healthy Cannabis Clones’s current guidance recommends moving rooted clones into a larger pot or final growing medium within a few days of arrival and keeping the medium moist rather than saturated.
Step 10: Don’t Overfeed Newly Arrived Clones
New growers sometimes assume that more nutrients will produce faster growth.
It can have the opposite effect when a plant is still establishing itself.
Healthy Cannabis Clones recommends a conservative approach during the early stage and advises using half of the recommended nutrient dosage for the first feeding before moving toward the standard product rate once the clone is settled.
Always follow the instructions for your specific growing medium and nutrient product.
Avoid combining multiple nutrient products simply because you want to accelerate growth.
During the first week, simplicity is usually easier to manage.
Step 11: Watch the Leaves During the First Week
Your clone will communicate a lot through its leaves.
You do not need to panic every time a leaf changes position or colour slightly. Instead, look for patterns.
Healthy adjustment may include:
- Leaves becoming more upright
- New growth appearing
- Stronger stems
- Improved overall appearance
- More consistent leaf colour
- Increasing plant stability
Potential warning signs include:
- Persistent severe drooping
- Rapid yellowing
- Brown or damaged tissue
- Leaf curling
- Mould
- Pest activity
- Significant stem damage
- No improvement after several days
If the plant continues deteriorating, investigate the root zone, moisture level, temperature, lighting, airflow, and possible pests rather than immediately adding more nutrients.
Step 12: Check for Pests Before Putting Clones Near Other Plants
If you already have plants growing, do not automatically place newly arrived clones directly beside them.
Inspect the new plants carefully first.
Look underneath leaves and around stems for visible insects or unusual residue.
A basic inspection can help prevent an issue from spreading throughout your growing area.
If you see something unusual, isolate the affected plant while you identify the problem and determine an appropriate response.
This is particularly important when bringing any live plant into an established growing environment.
Step 13: Give the Clones Good Airflow
Air movement is another important part of maintaining a healthy growing environment.
However, newly arrived clones do not need strong airflow directly blasting their leaves.
Aim for gentle, consistent air movement rather than excessive wind.
Good airflow helps maintain a more stable environment and can reduce stagnant pockets of moisture.
Health Canada also recommends adequate ventilation for indoor cannabis growing to help remove excess moisture and humidity and reduce mould risk.
What Should You Do During the First 24 Hours?
The first day should be simple.
Your checklist:
1. Open carefully
Remove the packaging without damaging the plant.
2. Inspect
Look at the leaves, stem, growing medium, and visible roots.
3. Photograph
Document the condition of the clone when it arrived.
4. Stabilize
Move the clone into an appropriate growing environment.
5. Use gentle light
Avoid immediately exposing a stressed clone to excessive light intensity.
6. Check moisture
Do not water automatically. Assess the growing medium first.
7. Monitor
Give the plant time to respond.
The goal is not to make the clone grow rapidly in the first 24 hours.
The goal is to help it recover from transportation and establish itself.
What Should You Do During Days 2–3?
By the second and third day, you should have a better idea of how the clone is responding.
Continue monitoring:
- Leaf position
- Leaf colour
- Stem strength
- Growing-medium moisture
- Temperature
- Humidity
- Light response
- Signs of pests or mould
If the plant is stabilizing, avoid making unnecessary changes.
This is where the less-is-more approach becomes useful.
Changing the light, watering schedule, nutrients, container, and environmental conditions all at once makes it difficult to determine what is helping or hurting the plant.
What Should You Do During Days 4–7?
By the end of the first week, a healthy clone should be moving toward normal growth rather than continuing to decline.
Look for signs of establishment such as:
- New leaves
- New shoots
- Firmer stems
- Improved leaf posture
- Increasing root development
- More consistent water use
Once the plant is established, you can gradually transition toward your normal vegetative growing environment.
Avoid treating the first week as a race.
A clone that establishes a healthy root system and adapts gradually has a much better foundation for the next stage of growth.
Common Mistakes After Cannabis Clones Arrive
1. Watering Immediately Without Checking Moisture
A droopy plant can tempt you to water immediately.
Always check the growing medium first.
2. Using Strong Light Too Soon
More light is not automatically better.
Give newly arrived plants time to acclimate.
3. Feeding Too Much
A newly transplanted clone does not need an aggressive nutrient schedule.
Start conservatively and follow the instructions for your chosen products.
4. Constantly Moving the Plant
Moving a clone from one location to another can create repeated environmental changes.
Choose an appropriate location and allow the plant to settle.
5. Ignoring Pests
Even if the clone looks healthy, inspect it carefully before introducing it to an existing grow area.
6. Changing Too Many Variables at Once
If you change lighting, watering, nutrients, temperature, humidity, and growing medium simultaneously, troubleshooting becomes much harder.
Make changes deliberately.
7. Panicking Over Temporary Drooping
Transportation can temporarily affect the appearance of a live plant.
Give the clone time to acclimate before assuming something is seriously wrong.
What If Your Cannabis Clone Arrives Damaged?
First, document the condition.
Take photographs of:
- The plant
- Broken stems or branches
- Leaves
- Root area
- Container
- Packaging
- Shipping label, where relevant
Then contact the supplier promptly and explain what happened.
Do not discard the plant or packaging before contacting the supplier if the company has a live-arrival policy.
Healthy Cannabis Clones currently states that it provides an arrive-alive guarantee and asks customers to contact the company if clones arrive damaged or in poor condition.
How Long Does It Take Cannabis Clones to Recover From Shipping?
There is no single recovery time that applies to every clone.
The condition of the plant before shipping, transportation conditions, packaging, temperature, humidity, root development, and the growing environment after delivery can all affect recovery.
Some clones may begin looking better relatively quickly, while others may require several days to fully adjust.
Instead of focusing only on the clock, look at the plant’s direction.
Improving:
New growth, stronger stems, better leaf posture, and stable colour are encouraging signs.
Getting worse:
Persistent severe wilting, rapidly developing discoloration, mould, root problems, or visible pests require closer investigation.
When Should You Transplant a Cannabis Clone?
A rooted clone should generally be transplanted when its root system and overall condition indicate that it is ready for the next growing container or medium.
Healthy Cannabis Clones recommends transplanting rooted clones into a larger pot or final growing medium within a few days of arrival, while first allowing the plant to settle and avoiding excessive moisture.
The exact timing can depend on:
- Root development
- Current container size
- Growing medium
- Plant size
- Environmental conditions
- Whether the clone shows shipping stress
If the plant arrives severely stressed, stabilizing it first may be more important than immediately changing containers.
A Simple First-Week Cannabis Clone Checklist
| Day | What to Focus On |
| Day 1 | Open, inspect, photograph, stabilize |
| Day 2 | Monitor moisture, light, temperature and leaf condition |
| Day 3 | Check for improvement and inspect for pests |
| Day 4–5 | Transplant if the clone is ready and established |
| Day 6–7 | Monitor new growth and gradually return to normal care |
The schedule is a framework rather than a rigid rule. Plant condition should guide your decisions.
What Does a Healthy Cannabis Clone Look Like After It Settles?
Once the transportation stress has passed, you want to see signs that the clone is actively establishing itself.
A healthy, established clone will generally show:
- Firm stems
- Healthy green foliage
- Active root development
- New growth
- Stable leaf posture
- No obvious pest activity
- No mould
- Consistent response to watering and environmental conditions
Remember that every cultivar and growing environment can behave differently.
Cannabis Clone Arrival FAQs
Should I water my cannabis clone immediately after it arrives?
Not automatically. Check the growing medium first. If it is already adequately moist, additional water may create unnecessary stress. Healthy Cannabis Clones recommends keeping the medium moist rather than saturated.
Should I transplant my clone immediately?
Not necessarily. Inspect the plant first and give it an opportunity to acclimate. Once the clone is stable and appropriately rooted, it can be moved into a larger container or final growing medium.
Why is my cannabis clone drooping after shipping?
Temporary drooping can occur after transportation because the plant has experienced handling and environmental changes. Give it stable conditions and monitor its progress before making major changes.
How much humidity should newly arrived clones have?
Healthy Cannabis Clones’s current growing guidance recommends approximately 65–75% humidity during the first few days after arrival.
Should I give my new clone strong light?
Start with moderate or gentle lighting and increase intensity as the plant begins showing new growth. The appropriate intensity depends on your lighting system and growing environment.
Should I give nutrients immediately?
Avoid aggressive feeding immediately after arrival. Allow the clone to establish first and follow the instructions for your growing medium and nutrient products. Healthy Cannabis Clones recommends a conservative first feeding approach.
What should I do if my clone arrives damaged?
Photograph the plant and packaging, document the problem, and contact your supplier promptly. If your supplier offers an arrive-alive guarantee, follow its claim instructions. Healthy Cannabis Clones currently states that it offers an arrive-alive guarantee.
Can I put a new clone next to my existing plants?
It is better to inspect a newly received live plant carefully before introducing it to an established growing area. Check for visible pests, mould, or other issues first.
Is growing cannabis at home legal everywhere in Canada?
No. Federal law allows limited home cultivation for adults of legal age, but provinces, territories, municipalities, landlords, and other authorities may impose additional restrictions. Health Canada specifically advises growers to check all applicable local requirements.
Final Thoughts
Receiving a cannabis clone is only the beginning. The first few days are about giving the plant time to transition from transportation to its new growing environment.
Start with the basics:
Inspect it. Stabilize it. Use gentle light. Check moisture before watering. Avoid aggressive feeding. Watch for pests. Give the roots time to establish.
You do not need to make your setup complicated during the first week. Consistent conditions and careful observation can go a long way toward helping a healthy rooted clone establish itself.
For Canadian growers looking for established plants, Healthy Cannabis Clones provides rooted, strain-verified clones and publishes growing guidance to help customers understand the early stages of clone care. The company states that its clones are rooted and inspected before shipping and that orders include an arrive-alive guarantee.